Tenant Admin — Allocating Credits
Overview
| Item | Details |
|---|---|
| Applicable role | Tenant Admin (tenant_admin) |
| Last updated | 2026-06-01 |
As a tenant admin, you can allocate credits from the organization balance pool to members under your tenant, enabling them to call models. This guide covers three allocation methods:
| Method | Use case | Entry point |
|---|---|---|
| Single allocation | Allocate credits to just one member | Balance Management page → Allocate Balance → Single allocation |
| Batch allocation | Grant the same amount to multiple members at once | Balance Management page → Allocate Balance → Batch allocation |
| Quick allocation from user list | Allocate to a specific member directly in the user list | User Management page → the "Allocate Credits" button on that user's row |
Every allocation deducts the corresponding credits from the organization balance pool and adds them to the target member's personal balance at the same time. Each operation is recorded in the balance transaction log for later auditing.
Prerequisites
- You have registered with gahorouter and signed in as a tenant admin
- The organization balance pool has allocatable credits (balance > 0)
- The target member already exists under the tenant and is in an active state
If the organization balance pool is empty, first top it up using the "Purchase" or "Redemption Code" feature. See the Tenant Admin Top-up and Credit Redemption guide for details.
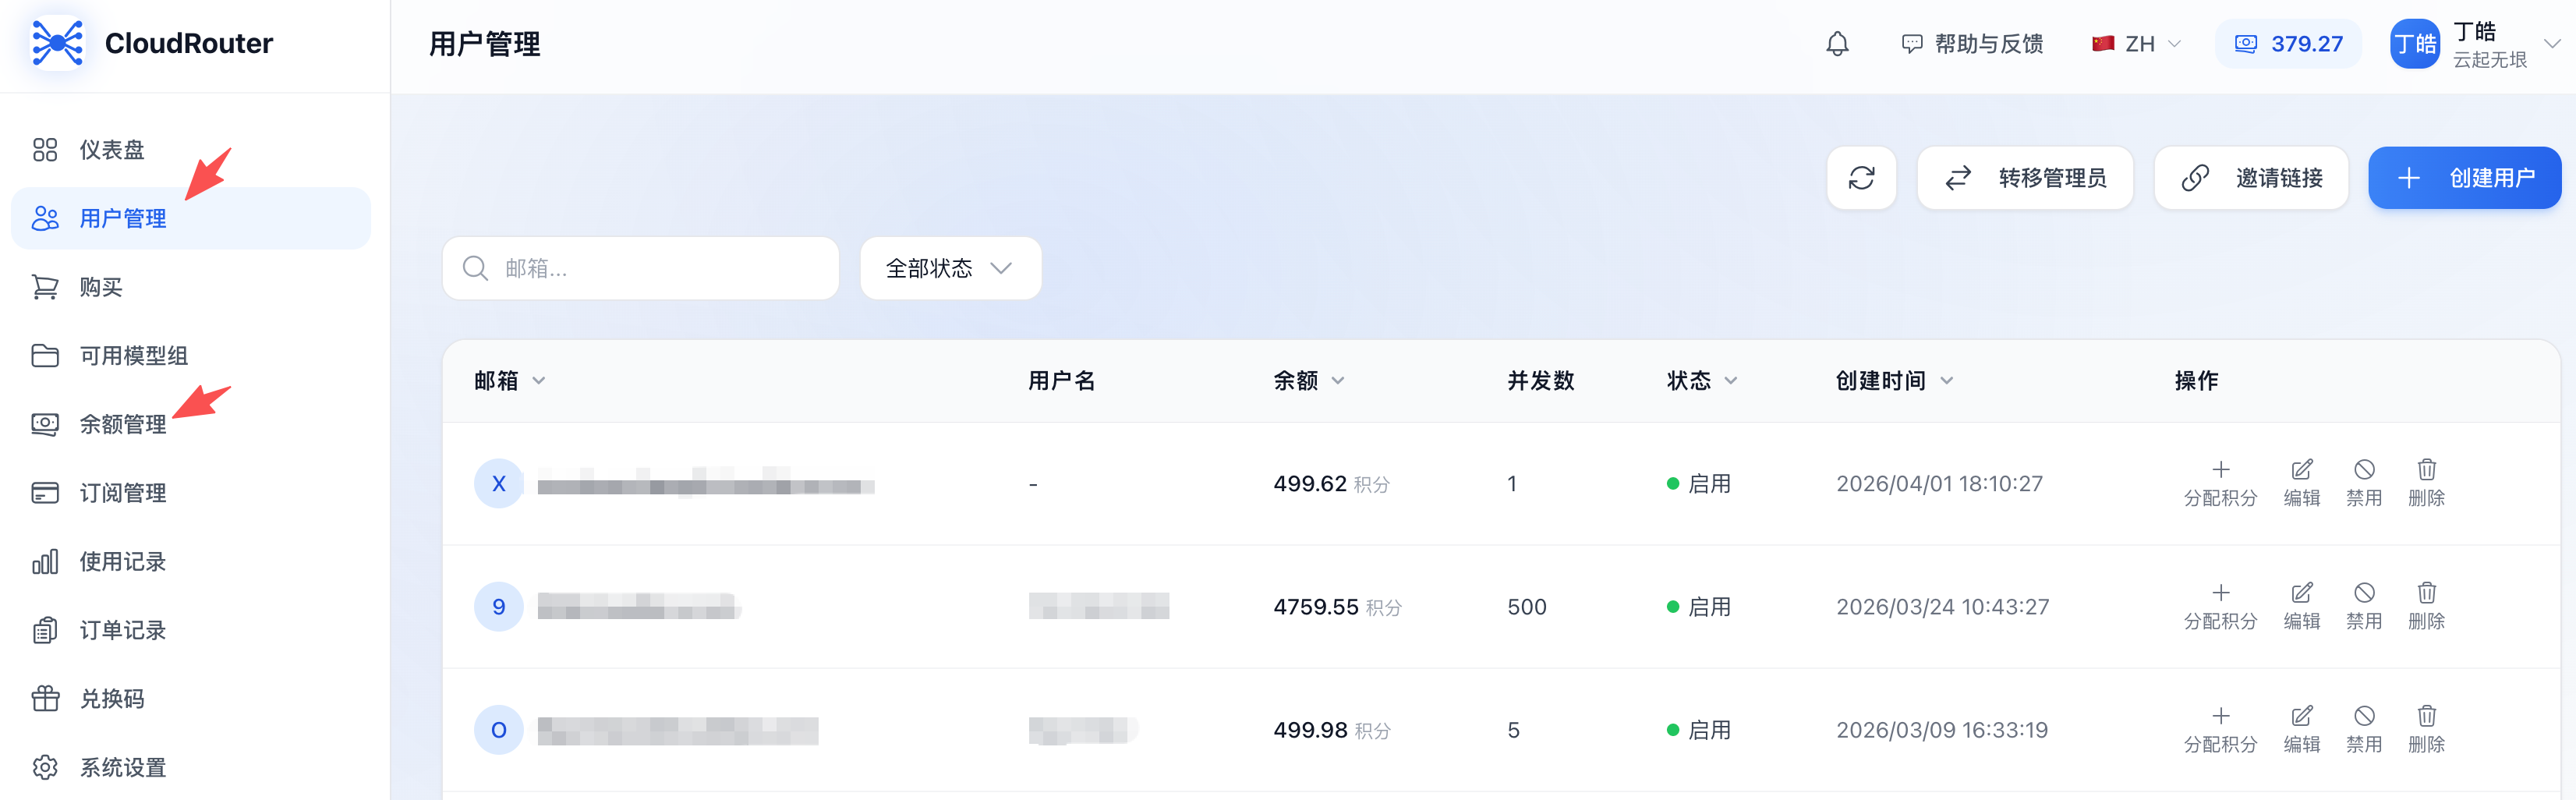
Entry Points
After signing in to the console, you can start an allocation from either of the following entry points:
| Entry point | Menu path | Supported methods |
|---|---|---|
| Balance Management page | Left navigation bar → Balance Management | Single allocation / Batch allocation |
| User Management page | Left navigation bar → User Management | Single quick allocation |
Method 1: Single Allocation (Balance Management page)
Use this when you only need to allocate credits to a single member and want to view the balance transaction log at the same time.
Steps
Step 1: Go to the Balance Management page
Left navigation bar → Balance Management
The top of the page shows the current organization balance, with an action button area in the upper-right corner:
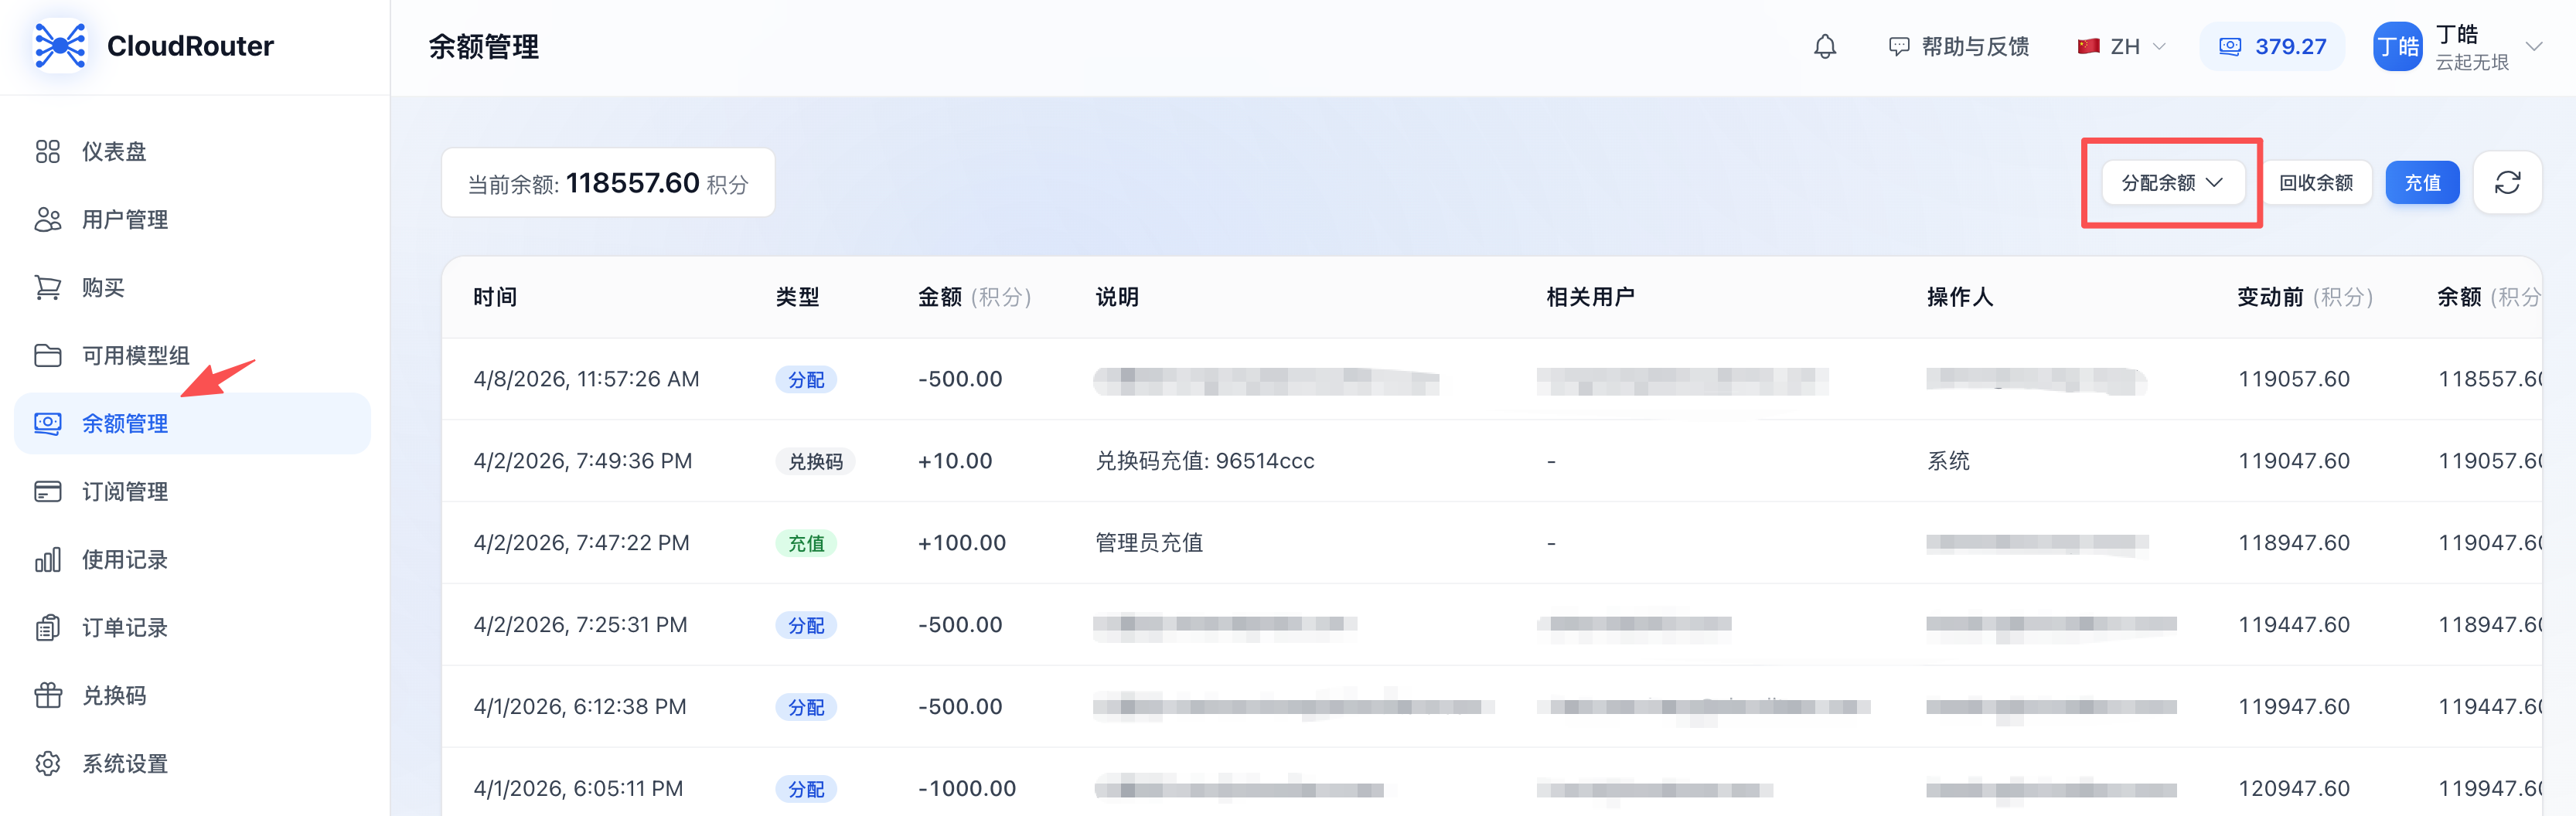
Step 2: Click the "Allocate Balance" dropdown button → select "Single allocation"
Step 3: Fill in the allocation details
In the dialog, fill in the following in order:
- Select user: Click the dropdown and type an email keyword (e.g., zhang) in the search box; the system filters matching members in real time. Click the target member's email to complete the selection.
- Allocation amount: Enter the number of credits to allocate (at least 0.01, up to two decimal places).
- Note (optional): Add a description for this allocation to ease later reconciliation, up to 200 characters.
Step 4: Click "Confirm"
- The system deducts the corresponding credits from the organization balance pool and adds them to the target member's personal balance
- On success, the dialog closes automatically and a success message pops up at the top of the page
- The balance transaction list refreshes automatically, adding a new "Allocation" type record
Method 2: Batch Allocation (Balance Management page)
Use this to grant an equal amount of credits to multiple members at once, for example initial quotas for a new team, monthly/quarterly subsidies, or project kickoff budgets.
Steps
Step 1: Go to the Balance Management page

Step 2: Click the "Allocate Balance" dropdown button → select "Batch allocation"
Step 3: Check the target members
- Type an email keyword in the search box to filter the list
- Check the checkbox in front of a single user to select it
- Check "Select All" to select all members in the current list at once (including the search-filtered results)
- The number of selected members is shown in real time below the list ("N selected")
Step 4: Enter the per-member allocation amount
- Enter the number of credits each member will receive in the "Per-member amount" field
- Below, the system shows in real time "Total allocation = Number selected × Per-member amount"
- If the total exceeds the organization balance, a yellow warning "Insufficient tenant balance" appears, and the "Confirm" button becomes unclickable
Step 5: Add a note (optional)
Add a description for this batch allocation to ease later reconciliation, up to 200 characters.
Step 6: Click "Confirm"
The system begins the batch allocation, and the button shows a loading animation to prevent duplicate submissions.
Step 7: Review the allocation results
All successful:
- The dialog closes automatically
- A message "Batch allocation succeeded, N members allocated" pops up at the top of the page
- The balance transaction log refreshes automatically
Partially failed:
The dialog does not close but switches to a results view, showing each member's allocation result row by row:
- Click "Retry Failed" to attempt allocation again for the failed users (successful users will not be allocated again)
- Click "Close" to end the operation; the successful portion has already taken effect
Business Rules
- Equal allocation only: All selected members receive the same amount; differentiated amounts are not supported
- Total cannot exceed the organization balance: The system validates in real time
- Minimum amount per allocation is 0.01, up to two decimal places
- After a batch allocation, one "Allocation" type record is generated in the log for each member
Method 3: Quick Allocation from the User List
Use this when you are already viewing member information on the "User Management" page and want to allocate credits to a member directly, without switching to the "Balance Management" page.
Steps
Step 1: Go to the User Management page
A group of buttons appears on the right side of the actions column in each row of the user list.
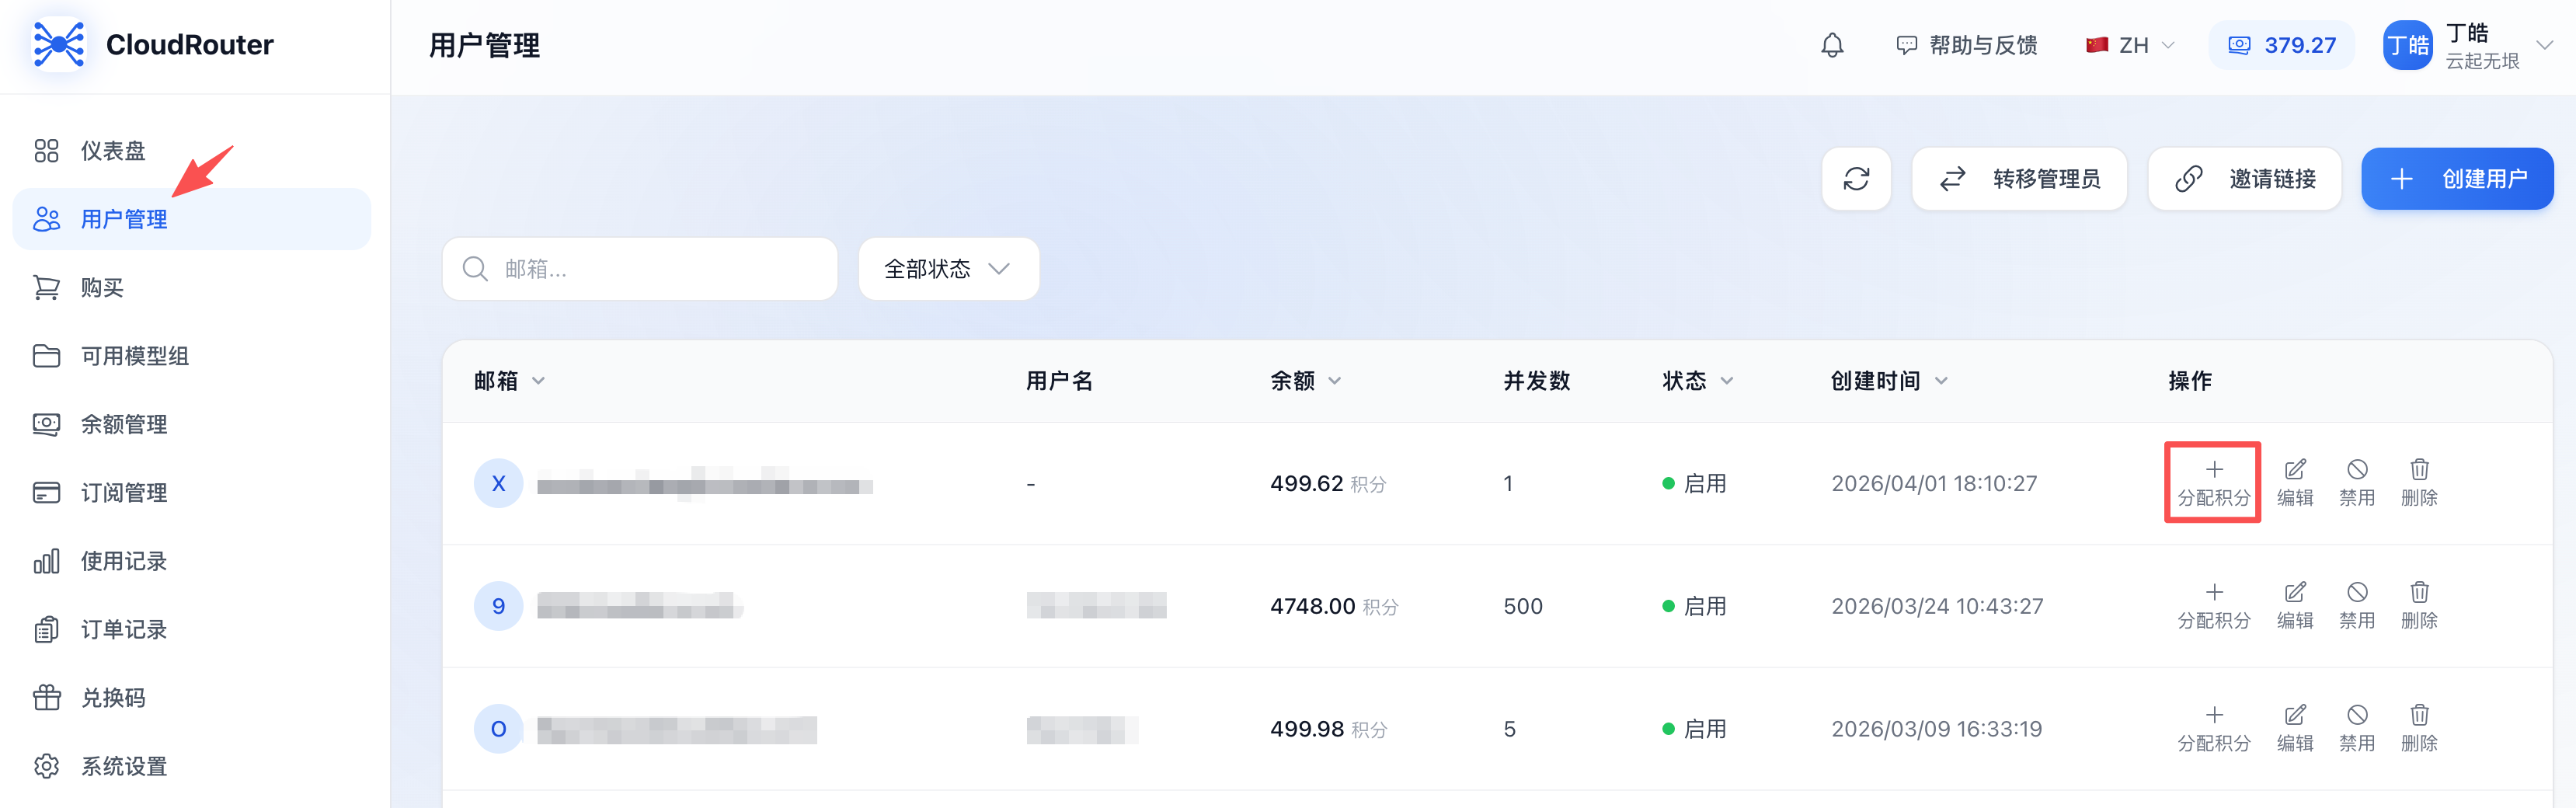
Step 2: Click the "+Allocate Credits" button on the target member's row
Note:
- Only active members display the "Allocate Credits" button; disabled members do not have this button
- When the organization balance is 0, the "Allocate Credits" button is grayed out and unclickable
Difference from Method 1:
- The "Select user" field is automatically locked to the member you clicked (grayed out and non-editable); no need to select again
- You only need to fill in "Allocation amount" and "Note"
Step 3: Enter the allocation amount and note
- Allocation amount: At least 0.01, up to two decimal places
- Note (optional): A description for this allocation
Step 4: Click "Confirm"
- The system deducts credits from the organization balance pool and adds them to the member's personal balance
- On success, the dialog closes automatically and a success message pops up
- The user list refreshes automatically
Business Rules Summary
- Prerequisite: The organization balance pool must be > 0, otherwise the entry point is disabled
- Only active members can be allocated to: Disabled or deleted members cannot be selected as allocation targets
- Minimum amount 0.01: 0 or negative numbers are not supported, up to two decimal places
- Total validation: The allocation amount (or batch total) cannot exceed the current organization balance, otherwise the Confirm button is disabled and "Insufficient tenant balance" is shown
- Real-time deduction: Upon successful allocation, credits are immediately deducted from the organization balance pool and added to the member's personal balance
- Audit trail: Every allocation generates an Allocation (blue tag) type record under "Balance Management → Balance Transactions", including the time, amount, related user, operator, and balance before/after the change
- Tenant admins cannot allocate to themselves: Allocation targets are limited to other members under the tenant
Viewing Allocation Records
The results of all allocations can be viewed in the Balance Transactions on the "Balance Management" page:
- The Type column shows a blue "Allocation" tag
- The Amount column is negative, indicating a deduction from the organization balance pool
- The Related user column shows the email of the member who received the credits
- The Description column shows the note you entered
- The Before/After columns show the change in the organization balance
While the organization balance pool is deducted, the member's personal balance increases. The member's balance change is reflected in their personal center.
Reclaiming Balance (Reverse Operation)
If you find an allocation error, or need to reclaim credits from a departing member, you can use the "Reclaim Balance" feature.
Steps
- Go to the Balance Management page and click the "Reclaim Balance" button
- In the dialog:
- Select user: The dropdown list shows the member's email + current personal balance
- Reclaim amount: At least 0.01, cannot exceed the member's current balance
- Note (optional)
- Click "Confirm"
Business Rules
- The reclaim amount cannot exceed the member's current personal balance, otherwise "Insufficient user balance" is shown
- Upon successful reclaim, the member's personal balance decreases and the organization balance pool increases by the corresponding amount
- A "Reclaim" type (orange tag) record is generated in the log
FAQ
Q1: Why is the "Allocate Balance" button unclickable?
A: Possible reasons:
- Organization balance is 0: Top up first using "Purchase" or "Redemption Code"
- No active members under the tenant: First create or invite members on the "User Management" page
Q2: During batch allocation, the "Confirm" button stays gray and unclickable. Why?
A: Please check:
- Whether at least 1 member is selected
- Whether the "Per-member amount" is entered and greater than 0
- Whether the "Total allocation" exceeds the organization balance (a yellow warning appears when it does)
Q3: Can the allocation amount be 0?
A: No. The minimum allocation amount is 0.01; 0 or negative numbers are rejected by the system.
Q4: Can I allocate a different amount to each person during batch allocation?
A: Currently not supported. Batch allocation only supports equal allocation (all selected members receive the same amount). To allocate different amounts, use "Single allocation" or "Quick allocation from user list" one by one.
Q5: Can an allocation be undone?
A: It cannot be directly "undone", but you can use the "Reclaim Balance" feature to reclaim the corresponding amount from that member, which is equivalent to undoing it. Reclaim operations are also recorded in the log.
Q6: Why do some members in the user list not have the "Allocate Credits" button?
A:
- Disabled members do not display the "Allocate Credits" button; click "Enable" in that member's actions column first
- If the button is grayed out and unclickable for all members, the organization balance is 0; top up first
Q7: What should I do when batch allocation shows "Some users failed to be allocated"?
A:
- The dialog lists each member's result and failure reason row by row
- Common failure reasons: abnormal member account, member disabled during the allocation, etc.
- Click "Retry Failed" to re-attempt allocation only for the failed members; successful ones will not be charged again
Q8: After allocating credits to a member, can they use them immediately?
A: Yes, the allocation takes effect immediately upon success, and the member can immediately use the corresponding credits to call models.
Q9: After allocation, are all the credits in the organization balance pool deducted?
A: Yes. Allocation essentially "transfers" credits from the organization balance pool to the member's personal balance. In the log, you can see that the difference between "Before" and "After" equals the total allocated amount. To restore them, use the "Reclaim Balance" feature to reclaim from the member.
Notes
- Allocation amount must be at least 0.01; 0 or negative numbers are not supported
- Disabled members cannot receive allocations; enable them first before proceeding
- Batch allocation only supports equal allocation; for differentiated allocation, use single allocation
- Allocations take effect immediately; carefully confirm the amount and target member
- All operations are logged; the balance transaction log can serve as an audit basis
- Plan your allocation strategy reasonably based on the organization budget and members' actual usage, avoiding "hoarding" or "overspending"
- For departing members, promptly use the "Reclaim Balance" feature to reclaim unused credits
Contact Us
If you encounter any issues during use, please contact us promptly.